
| Legal disclaimerBy downloading the image to the left you acknowledge that it is not designed or intended for use in the design, construction, operation or maintenance of any nuclear facility, spaceship, or time machine. |
Making a complex slide rule
This page contains all the information you need to make your own complex number slide rule. You can choose between three styles: the rather primitive planar model (DuMond, 1920), the "lamp-chimney" style (Faber-Castell, 1952; Sander, 1956), still easy to build but harder to use; and the "Fuller-type" slide rule (Whythe, 1961).
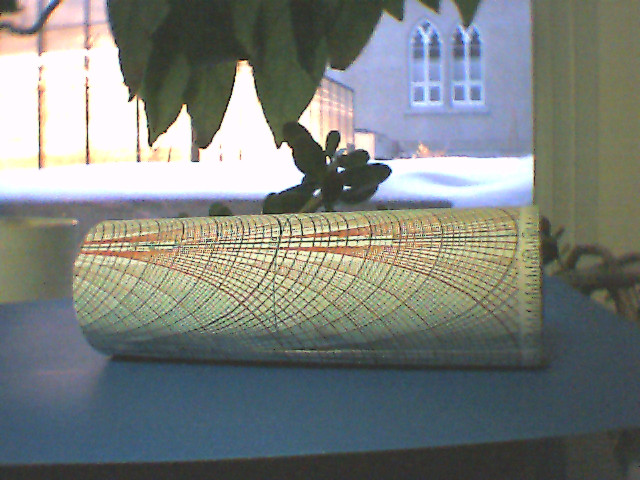
The basic raw material is this image. Click on it to download a GIF version.
|
| Legal disclaimerBy downloading the image to the left you acknowledge that it is not designed or intended for use in the design, construction, operation or maintenance of any nuclear facility, spaceship, or time machine. |
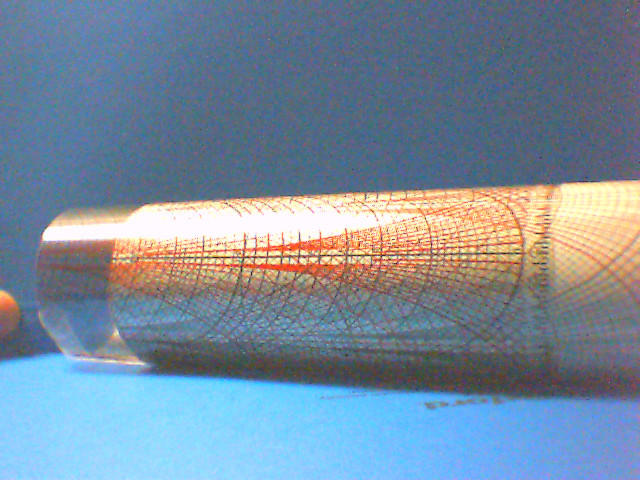
This is essentially the same file used as a cylindrically-mapped image pigment file in the raytraced image here. It will probably be larger than you need, but can easily be scaled with Photoshop, PhotoPaint, the GIMP, or any other decent bitmap manipulation program. (If you know about "conformal maps" in complex analysis, you may wonder whether rescaling has to preserve aspect ratios. It doesn't; you can make your scale proportionally wider or taller.)
To find a complex number: locate its real part on one of the black vertical axes and its complex part on one of the red vertical axes. Follow the transverse lines; where they intersect is the complex number you want. Note that one black axis represents positive real parts, the other negative real parts; and similarly for the red axes.
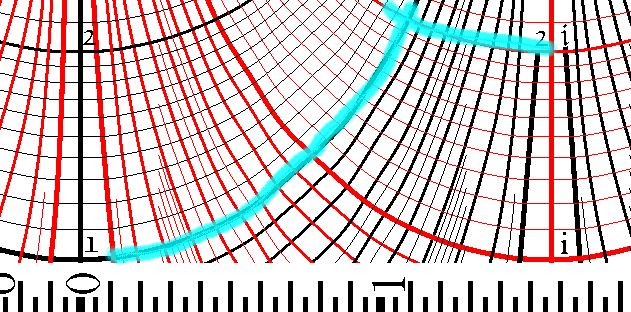 This picture shows how to find the complex number 1+2i.
To multiply complex numbers: Overlay the transparent sheet on the opaque sheet. The sheets should have the same orientation, and the point 1 of the transparent sheet should lie over the point on the opaque sheet reprenting one of the numbers you want to multiply. Now find the other factor on the transparent sheet. The point directly below it on the opaque sheet represents the product. (If you're off the edge, use the point 10 instead of 1. People using ordinary (straight) slide rules sometimes had to do this too! Circular slide rules didn't have this problem.)
To divide complex numbers: Align the divisor on the transparent sheet with the dividend on the opaque sheet. The point 1 on the transparent sheet aligns with the quotient.
To find the absolute value: Align the green line on the transparent sheet with your number. Where it crosses the black (positive real) axis on the opaque sheet is the absolute value.
To find the argument: Align the black axis on the transparent sheet with your number. Where it crosses the scale numbered 0,1,...6 at the bottom of on the opaque sheet is (one value of) the argument (in radians of course).
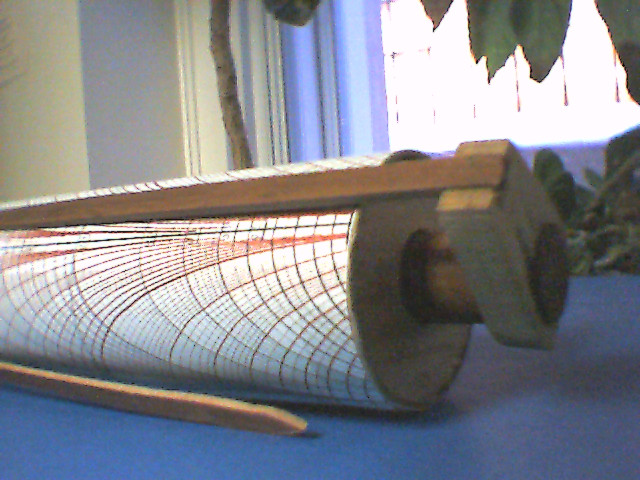
Prepare two discs of wood that fit into the ends of the mailing tube, with centered holes that allow the cylinder to slide smoothly on the dowel. Make the following (use your imagination!)
This idea can even be taken further; if you can keep track mentally of which quadrant of the complex plane you are in you can double your effective size again. If you cut vertically on either side of the real axis, halfway out to either imaginary axis, and rescale, you can wrap the resulting image into a cylinder, and the contours of the real part will meet up neatly with those of the imaginary part. As the pattern can be rescaled arbitrarily in the longitudinal direction, it is posisble to quadruple the effective linear dimension of the rule! Had Whythe done this, his instrument would have had a precision at least as good as that of a standard 12" slipstick. (though it would have been a little mindbending to use) You should probably make a black-and-white copy of the scale before trying this, as the same set of contours serves for both real and imaginary parts, so the color coding is now meaningless.
Back to Robert Dawson's home page ............Back to Robert Dawson's raytracing page ............Back to the raytraced image ............Back to the top of this page